10/30/10

bountiful baskets

My mom introduced me to bountiful baskets this past week. I tried it and it is the BEST thing I have ever done!!!

Bountiful Baskets is a co-op that a whole bunch of people pool their money to get a great deal on produce. It is 15.00 for a LARGE bundle of food – 50% veggies and 50% fruit – or 6 fruits and 6 veggies. This is a volunteer organization so on your first time you pay a 3.00 fee on top of the cost of food, to have them purchase you a basket to sort the produce. I was a little skeptical about this, but I am so overjoyed at the results!

IMG_4676

For $15.00 I got around:

  • 10 pears
  • 10 apples
  • 2 lbs grapes
  • pineapple
  • blackberries
  • 10 bananas
  • head of romaine lettuce
  • 5 tomatoes
  • bag of fresh green beans
  • 12 sweet potatoes
  • 2 cucumbers
  • 1 yellow squash

IMG_4674

Amazing huh? It is almost enough produce to last us 2 weeks and I usually spend $25.00 on produce every 2 weeks. Everything is fresh and healthy.

 IMG_4675

They have places in Colorado, Oregon, Idaho, Utah, Montana, Washington, Wyoming, Nevada, Arizona & Texas that do this. Their website is kind of hard to understand, but this is what you will do:

  • Go on to their site at bountifulbaskets.org
  • You can click on Locations to see if one is offered close to you
  • You can click on Current Offerings to see what they are offering for the week
    • I love the idea of bread baskets and Mexican baskets that offer tomatoes, chilies, onions and such.
    • Today they don’t have any offerings because they had one this morning. I would check back next Monday. That is about when I did mine.
  • When there is an offering you just make an account and purchase. Then when you go, make sure you take your own box/laundry basket to bring your food home in.

10/28/10

reshape your plate – part 4 – choosing foods

Slide1

Have you been applying this yet? I want to hear your thoughts as you learn and try new things. I know that I have a lot to learn with all this still, so please share!

Here are the other parts of my reshape your plate series if you are interested in catching up! All parts here.

To review the three layers

  1. Reshape your plate
  2. Serving sizes
  3. Food choices

I have talked about the first two, but now we are on the third! Food Choices!

What constitutes a good food choice?

Here is The Plate Method with food choices added on top of the colors and portion sizes.

image

I really don’t feel like I need to say more on this. It is pretty self-explanatory. But I will give some overview

The food groups for your plate are

  • 1/2 plate veggies (1/4 should be dark greens or oranges and the other 1/4 another veggie)
  • 1/4 plate grains and/or starches (potatoes, corn, peas, and lima beans are considered starches – so those don’t count as veggies
  • 1/4 plate meat and beans – I talked a little last time about portion sizes for your meat. I like that this diagram has lean, very lean, and dry beans and peas sectioned out. This becomes helpful in planning meals.

Which is for next week! Are you finally ready to get into some application of this!?! YES!

10/27/10

heaven in a jar

I saw this cute idea and had to make one of my own. I know that pie in a jar is really popular, but cake?… it is WAY easy! Just take an 8 oz canning jar, shove a cupcake (baked without papers) in the bottom, layer with frosting, another cupcake and more frosting. I put some sprinkles in for a surprise on top. A note, ribbon, and a spoon top it all off! These are SO easy and just look so creative. These make great gifts! Just try not to lick your fingers!

IMG_4662

halloween lanterns

I saw this somewhere online and I thought, now that is something that I can do and that I would like. Carving pumpkins just isn’t my thing. Just mod podge, tissue paper, construction paper, a tea light candle and some jars will get you this look. I am really excited to set these out on Saturday. I like that I can also pull them inside for a fun dinner on Sunday! I was thinking how fun it would be to make these and put some candy or ingredients to make cookies in them to give to friends.

IMG_4672 

IMG_4671

10/26/10

finance food for thought no.3

Slide1

Buying the bigger size isn’t always cheaper

I just got a Costco card today. We used to have one in NY, but in NY we would travel over an hour to go grocery shopping. Buying big sizes helped a lot. However!!!

I priced almost every item on my HUGE grocery list (Confession: I haven’t been grocery shopping in over a month). It took a long time, but I am so grateful that I did. Maybe you can glean some info from this too-

Cheaper Items

  • Olive oil per ounce
  • Only some cereals! You need to price out per ounce on those. I bought Frosted Mini wheat, but that was it
  • Multi Vitamins
  • Milk – My Skim milk was as cheap as the grocery store, but whole milk was more expensive
  • Bulk candies

More Expensive Items – just to give you an idea

  • Eggs
  • Some granola bars
  • Toothpaste
  • Diapers (wal-mart’s and target’s generic brands beat out by almost .06 a diaper!)

I didn’t price out any produce because I purchase mine at Sunflower Farmer’s Market. They are a company that specializes in health foods and produce. Most of the time they are the cheapest. I like supporting them.

Sometimes it just isn’t logical for you to buy in bulk! We get sick of the same granola bars for a month! We also don’t need a 48 ox can of evaporated milk when in my life I have never used it in a recipe until today and probably won’t use it again. Plus, spending $200 just might not fit in your budget for the month. In this case you don’t want to only get 1/3 of the groceries you need.

The last thing that is actually a positive about these warehouses are that you can order online and then just go pick up what you need. It can save so much time AND no impulse buys!!! When we were in NY I would order online about two days before I went down and then all I had to do was pay and take it out to my car. It really helped when I was pregnant too!

Overall, I love shopping at wholesale warehouses! It is really fun! I love looking at books, home goods, and clothes. They have great samples ;) too. Just be careful!

Next is in the grocery store! I was at Winco a couple of weeks ago and I needed tinfoil. I went to grab the bigger size, but I looked and the smaller size was cheaper per foot! This happens to me all the time. It really pays to keep a calculator in your purse. You will know me in the grocery store because I always have my handy-dandy calculator out crunching numbers. Sometimes stores are awesome because they have the price per ounce or pound already calculated for you! Just watch sale tags, they usually need recalculated.

Buying the bigger size isn’t always cheaper

10/25/10

naked no more!

I made some wonderful progress today with my bedroom. Here is a before picture of it that I will constantly refer to in my bedroom remake endeavors. I don’t know how this room could get any worse! Well, take away my mattress pad heater and I will be in despair (and a really bad mood).

 IMG_4620

It was so depressing, I hardly ever made the bed. For months I have been craving a complete bedding set and it had to be something that sang. You know how that goes. Anyway, I looked for months and never found anything until last weekend, by chance. After about 14 hours of sewing I have the duvet cover, 2 euro shams, and 2 standard shams done. I still have some decorative pillow to do. Then I will be on to that pathetic dresser in the corner and the blank wall above the bed which will give me my own heaven.

   IMG_4626

Here is the painting that is inspiring my color pallet. I think that I want to try throwing some light blue in for an accent color. What do you think? I am just so excited to finally be able to sleep!

IMG_4628

Here are some tips that I did with this bedding set…

Our comforter fill always falls to the outside of out bed. Then it goes from warm to freezing cold in about a week. I will pull out the comforter and shake all the fill back into the middle, but it was always temporary. So this time, I shook everything into the middle and then sewed a big square about a foot from the outside on the duvet. No more sneaking away feathers!!!

IMG_4624

The other trick that my mom taught me has really helped! You sew ribbon on all four corners of your duvet and the inside corners of the covers. Then when you put the duvet in the cover, tie the ribbons together from one corner to the matching corner in the cover. Then the comforter won’t slip around. Brilliant!!!

IMG_4625

10/24/10

today… starting with yesterday

Today was a rough day.

This rough started with my day yesterday. I planned too much for the day.

I had in my head that I would complete a whole bedding set, pillows and all. I would prepare two lessons for church, make cupcakes, cuts A’s hair, vacuum, and fold my laundry.

Not one thing was completely finished besides my lessons, and those weren’t spot on.

A and I went out early in the morning to run our errands to get the finishing touches for my project so I could start sewing. I started sewing at 11:30 am… when 7:30 pm rolled around and I wasn’t even done with the duvet cover, my emotions plummeted low.

How could I have not finished everything I set out for doing? 

I took a time out on my bedding-less bed trying to analyze what went wrong, while all along knowing that I knew this would happen before the day even began. I planned too much.

With much gratitude, my husband and girl came to cheer me up and help me get back to work again. They vacuumed, picked up toys, and then he took A out to some friends so I could have time to do my lessons. The night finished fairly well with no trailing emotions… or so I thought.

This morning was like someone opened the flood gates to my emotions. I was crying about everything, starting with the rain outside. My mood was as dismal as the rain. I didn’t feel the comfort of the Holy Ghost in letting me know that the lessons I needed to teach would be what someone needed to hear. I was aware of everyone – like they could see through my facade and see that I was having a hard morning. In sacrament meeting, it seemed like all I did was tell A to sit down, get off the floor, or turn around. I struggled through my lesson (and thankfully, didn’t have to teach the other one in the end) and seemed to notice just how many of the sisters weren’t paying attention. I just felt like a complete failure.

I came home from church, undressed and climbed into bed. I laid there for some time pondering on the events of the past two days. Then I was sparked by President Uchtdorfs talk from Conference about slowing down. I felt the sudden comfort from the spirit that I needed to read that talk again, that I planned too much, that it wears on my family when I do, that I need to do better at balancing my time.

I love this quote from President Uchtdorf’s talk :

My dear brothers and sisters, we would do well to slow down a little, proceed at the optimum speed for our circumstances, focus on the significant, lift up our eyes, and truly see the things that matter most. Let us be mindful of the foundational precepts our Heavenly Father has given to His children that will establish the basis of a rich and fruitful mortal life with promises of eternal happiness. They will teach us to do “all these things . . . in wisdom and order; for it is not requisite that [we] should run faster than [we have] strength. [But] it is expedient that [we] should be diligent, [and] thereby . . . win the prize.”

I changed pace for the rest of today. I have slowed down and hid my to do list for tonight. My dishes aren’t done, my house is kind of disheveled, but my family is happy and I feel so much better. I understand what the prize is now and tonight, I obtained it.

10/22/10

friday feature favs!

I am finally back from my parent’s house in Colorado. We had such a wonderful time, but here we are back to the swing of things. Well trying. For some reason, it has been terribly hard to kick it into gear today. I would like to blame it on the cold weather, but I do feel overwhelmed at all I need to do.

Anyway, so for the post today, I am featuring other blogs that I have stumbled upon today… wonderful talented people!

First is this creepy, crawly dish from Be Different… Act Normal

Also on this site is a great idea to mix things up in your kitchen with this – It makes me wish I had a kitchen aid to do it with. I am wondering how I could do it with my plain Bosch mixer.

Next is the cutest dessert truck table on Amy Atlas designs. Check out the sugared pears and the cute fabric strip chandelier.

Then last, but not least is the find of the week! It is a site called Made by Joel that I have fallen head over heels for! His stuff is so simple, chic, and just well done. Check out this cute Dancing Deer idea – This would be such a great idea for an afternoon activity with any child or even a car trip to Grandma’s house!

Enjoy your Friday night and get ready for some crafty posts to come!

10/21/10

reshape your plate series – part 3 – portion sizes

Slide1

The next part in our series has to do with portion sizes- if you didn’t catch the first two check them out here. So we talked last time about the difference that the plate shape has compared to the pyramid – the visual difference. With the Plate Method, portion sizes become SO easy!

The plate method covers these questions-

  • What is a portion size?
  • What are the number of servings per meal
  • What are the number of servings per day

image

According to this method, if you followed it for only two meals (lunch and dinner) you would have fulfilled almost every requirement of the pyramid. And if you followed it for three – you would get all requirements done and be eating more than required.

Sometimes more the required is a good thing. Let me explain. I have been watching some food movies (Food Inc, and King Corn) and in our culture right now, most of the fruits and veggies don’t have all the nutrients they once had. Because they have been genetically changed, fruits and veggies (and I am sure meats and dairy) grow faster. When they grow faster, they don’t have enough time to mature and create the standard amount of nutrients that the food pyramid once asked us to eat. If I remember right, you have to eat at least 3 apples to get the nutrients you once had in one fully seasoned, slowly grown apple. Does that make sense? So we actually need to eat WAY more than 2-4 servings of fruits a day. We have to eat at least 6.

That seems a little hard to do! 6 servings! Imagine compounding that into every other category of food!!! So much! I know it can’t be done, you can’t eat that much, But you can pick the right foods (when you can. This is our third level and what we will be talking about next week in part 4

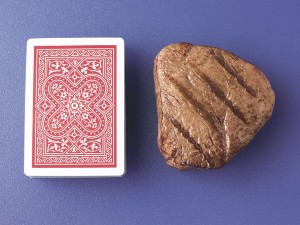
But still on serving sizes- I love the plate method because I love that it fits guidelines! You know how a serving of meat should be the size of a deck of cards?

When you eat, is it usually that way? I could probably say that the majority of the time, it is half your plate. Especially in a steak and potatoes restaurant? Yep! What if you are at a buffet and you have your plate (probably about 11” in diameter) in hand and you get to the meat section… how much is the right serving you ask yourself. I am sure I would probably just take some random pieces and eat them. But in the Plate Method, you know that meat needs to equal 1/4 of your plate. Done… and awesome!

10/20/10

it’s beginning to look a lot like---

Seriously!? I can’t believe that Christmas is just around the corner! Why not start your Holiday season off right with this beauty from Crate Paper!

This is Christmassy but not overwhelming for the beginning of this cold season! I would love to see two of these in different sizes on an entryway table with some fake snow.

going batty

Have you seen this over at Made? I just think Dana is just brilliant for doing this decor! I love that the bats look like they came through the window too! She even put some outside coming in.

10/19/10

projecting

Have you ever tried making clothes for yourself? Unless you are a terribly lucky person, I am sure you have had many clothes that haven’t fit right, or that you need to alter… but if you are like me, altering your own clothes can be really hard. Usually a dress form is the answer. My mom has been having a hard time trying to find a dress form that REALLY fits her figure. The bust wouldn’t go small enough and the hip not big enough. It was getting really stressful for her. She got online to see what other women have tried in fixing this dilemma… and she found an answer! Make your own! Of course, what a great answer! So we decided to take on the task yesterday.

Here are some sites that she and I looked before we started… I was going to do a tutorial, but it is a lot of work! So I chose the easy road for today.

It took about 2.5 rolls of duct tape, saran wrap, 3 hours, and LOTS of batting to fill it in! You could also use old pillows too. We haven’t finished her base, but it is awesome! It really worked!

IMG_4590

 IMG_4591-1 IMG_4594-1

 IMG_4601 IMG_4599

We took some colored duct tape to mark the bust, waist, hips and center (in front and back). This was the BIGGEST help ever! It helped us line up the back once we cut it apart and will help in making sure your clothes are fitting and placed right.

10/18/10

financial food for thought no.2

Slide1

prioritize your expenses

Grab a piece of paper, and using your budget or spending records, figure out what daily, monthly, yearly expenses you have. just write them down on a piece of paper. We have expenses like rent, insurances, charitable contributions, savings, internet. You might have things like phones, credit card minimum payments, school loan payments, and other loan payments.

Put these in a list of the most important to pay first and then down to the least important. For example, it has been show that financially successful families pay at least 10% of their net pay towards charities. Note that just because you don’t pay doesn’t mean that you will become successful, it was just noticed that in financially successful families, it is a common trend. So we have put our most important expense as charitable contribution. Something further down on the list is internet. Yes, it is VERY important to us, but we know it is something we could live without if we ever needed to cut our budget.

Prioritizing our list of expenses really did help us to see what we could live without. Going back to internet. At one point in the past year, we were going over our finances together and realized that we were paying WAY too much for internet and it was kind of sucking our home budget each month. So, we looked at other options. We checked out a lot of other companies and found a company that was a little less than half of what we were paying. We also liked that it was month-month instead of a contract so we could cancel at any time if needed. Lately we have been looking at more options in the internet area. The neighbors around us all have internet so we have been chatting with them to see if we can just give them our router and then split the monthly cost. If there are 4 town homes on the same internet, that is us only paying 1/4 of what we are paying now. Awesome!

So ask yourself with each expense…

Is this really necessary?

  • If it isn’t, CANCEL IT!!!
  • If it is, think of ways that you could reduce the cost
    • do you need to move across the street to the cheaper apts?
    • can you change providers?
    • can you make it? (like my laundry soap)
  • Is there a way to make a bigger purchase now, to cut costs in the end?
    • Like buying a used washer and dryer off of craig’s list so you don’t spend $10.00 on laundry a week

It is IMPORTANT to be honest with yourself.

prioritize your expenses

10/17/10

color

Nail polish, for me, is like the greatest way to pick up my moods. I also feel like painted or nicely manicured nails are like accessories and can really top off an outfit – however, I wish that I could paint mine more often. To keep your fingernails and toenails looking nice can take a lot of work. Sometimes I can get myself to do it, but sometimes a nice trim and a clear coat of polish is all I can get done :)

But I did make time last night to paint my nails- I tried two new colors and I am smitten!

They are both by Rimmel London. The first is what I painted my fingernails. It is called Steel Gray and is a really popular color right now for nails. It really tones down an outfit, but gives it sophistication. I noticed that it takes about three coats to get opaque, but is wonderful! It takes on different base hues when paired with certain colors.


The second color is called Purple Rain and I painted my toes with it. It is almost black when given a double coat and I like that. Black always seemed to dark for me, but this is a great substitute for black. Love it!

10/16/10

discovery

Have you ever heard of Boden? Just amazing! My mom got a catalog in the mail and I straight-way got online and requested one for me. They have men, women, children/baby, and teen. I have just fallen in love with their stuff! I love that they have lots of modest pieces. I think that I also find more inspiration from them, than feeling like I have to purchase pieces from them.

Check them out here! http://www.boden.co.uk/


Isn’t this handsome?

They also have an outfit maker!!! Awesome! Here http://boden.mixmatchme.com/MME/boden/home.aspx

10/15/10

286 – love day

my parents celebrated love day on Wednesday. 286 is I love you * 2. So ‘I’ has one letter and you times it by 2 to get two. Then 286 is the day in the year. I think it is sweet of my parents to do.

My dad went and bought my mom flowers and when I got into Colorado, they were just in a vase. My mom, being so sweet had saved them for me to arrange. I was more than happy to since I love working with flowers. It is something spiritual to me.

 IMG_4277

 IMG_4278

 IMG_4279

My dad also took my mom, me, and A up to Ralph Lauren’s ranch outside of Ridgeway, Colorado. It was so spectacularly beautiful! So is my family, but I may be bias!

  IMG_4210

 IMG_4256

IMG_4272

 IMG_4276

in love

I was looking through my mom’s Elle magazine and I ran into this ad by Vera Wang. Can I just share with you how in love I am with this photo. Maybe it is her expression, maybe her natural beauty, maybe the simplicity of the look, but I love it! Classy and beautiful!

saving $$$ on jeans

If you are anything like me, September/October rolls around and I feel the need for some new crisp jeans! Maybe it is the whole beginning-of-the-school-year thing. So if you are heading out to buy some jeans, keep these tips in mind-

  • Look for fabrics that are blends – pairs of jeans will last longer when there is spandex in them (like 2%). The spandex will help your jeans keep shape and not give you a saggy bottom after a few wears :)
  • Choose a dark wash – this will help when you wash it over and over again to keep up color and look less worn (unless, you are in the grunge look)
  • Buy online - If you know what you wear, try online because you can always find coupons on websites like retailmenot.com. However, this won’t work if you are changing body shapes! After I had my daughter I tried on hundreds of pairs of jeans over a year period as I lost the 50lbs I gained with her. I didn’t want to buy expensive jeans every couple of months, so I shopped TJ MAXX and Ross for jeans. I have jeans in every size!!!
  • Stock up now – Fall is the best time to buy jeans because it is the stock-up for the season. You can shop shefinds.com and thebudgetfashionista.com for sales

10/14/10

cropped slacks

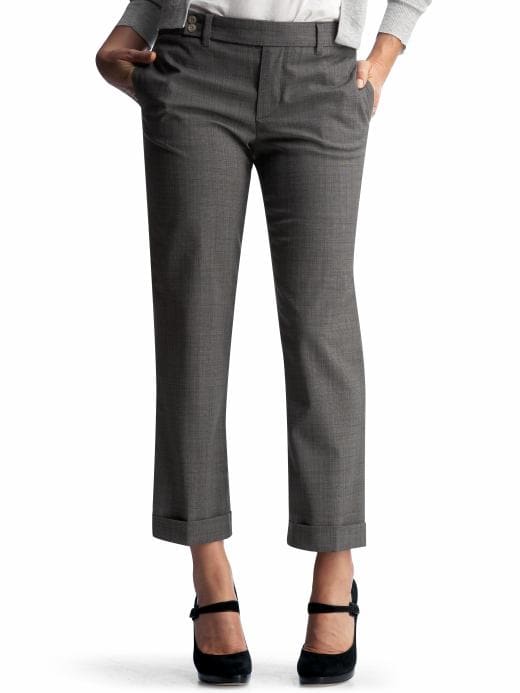
Crops are so in style this season. They are the perfect staple for a wardrobe because they go through summer to fall perfectly! I loved cropped pants because when I (at a 36” inseam) purchase most regular length pants… they are already cropped for me! Here are some tips on how to wear these pants-

  • try a sleek little belt… trousers can look so masculine, so it is nice to have a feminine belt to lighten things up
  • if you have a tummy, try a belt that is close to the same color of your trousers so it doesn’t draw attention to your middle. If you don’t have a tummy, more power to you! Wear a contrasting color!
  • if you are shorter, try a crop from Gap! They have some great short lengths!
  • I am sometimes confused on what shoes to wear and if you are, here are some tips that I use to guide me
    • With slim crops, try slip on feminine flats

    • With a cuffed crop, try some pumps, peep toes, or simple Mary Janes

    • With a looser crop, try something edgy like a booty or platforms

reshape your plate series – part 2 – reshaping your plate

Slide1

Last time I talked about the history of food guides and what have changed over the years. Then we talked about the food pyramid now and why it really doesn’t work. Finally, introduced you to the Plate Method. I forgot to mention that this isn’t any idea from me or my professors, it is from some Swedish nutritionists (Margit Eliasson, Brita Karlstrom, and Birgitta Melin; and Bengt Vessby, MD). Since the 1980’s when they made this method it has been revamped. I got my information from http://www.fmdrl.org/ the Family Medicine Digital Resource Library, from my class, and from the University of Utah.

image

So a brief overview, the plate method has three parts which facilitate better learning and understanding

  1. Reshape your plate
  2. Serving sizes
  3. Food choices

I wanted to go into the first layer – Reshaping your plate

The main advantage of the first later is that the Plate method shows the proper plate distribution and it emphasizes food groups and relative ratios.

image

Where things go doesn’t really matter, but it is a good rule to follow. Sometimes you may find that your milk in cheese melted on your veggies; however, in many cases, it won’t (and SHOULDN’T) be near enough cheese for your daily serving on milk. In our family I just use a bit of rationality when I am planning and making my meals. I think you are smart enough to realize if your extra cheese pizza has a full serving of milk on it :)

This layer is pretty simple. It just shows the relationship of foods to one another in what we are supposed to be eating. It is a new concept for most, and even restaurants don’t serve meals like this! Next time we will talk about serving sizes.

10/12/10

baby diaper tutorial

My little A is obsessed with diapers! She makes every stuffed animal and baby doll get their diapers changed… she has even tried to change me. That was awkward! Sometimes this “potty” language gets us into humorous positions… like the other day at Kohl's when she started talking to the only other lady in the restroom about her potty time. Believe me, I tried to leave fast!

I had some worn out tanks from Down East Basics that are pitted out (armpit stains) and the hems have come out as well. I was just going to chuck them until I felt enlightened to make them into some mini-sized diapers. My train of thought was that cloth diapers are dingy like this… and then the idea dawned on me! I could make some diapers that A could use to support her potty whims – instead of using the real diapers.

I thought I would share with you instructions-

IMG_4151


Materials-

  • fabric – i suggest either a flannel or a knit. I wish I had some flannel to make some soft – unstretcy ones.
  • Velcro
  • ribbon (optional)
    IMG_4131

Instructions

First I needed to make a pattern. So I measured the main Baby’s rise and waist. Then I created a pattern off of that using the idea of a real diaper. The back needed to be longer than the front so they could overlap and Velcro.

 IMG_4135

Then I cut out my pattern and pinned it to my tank. Lucky for me I could get two diapers out of each tank and it was already doubled for me. So I cute 4 diapers total (or 8 pieces).

IMG_4137 IMG_4138

 IMG_4139

Next is the sewing part. I am still learning to sew knits so forgive me if it is a terrible job. Anyway, if using knit, use a zigzag stitch and stitch around the diaper, leaving about 1.5 inch opening in the back (long side of the diaper) for you to turn it inside out. I used a purple thread to show you the stitching.

IMG_4141

Then I turned the diaper inside-out and use a slip stitch to sew the hole in the back together. 

Next, I took some random Velcro pieces and sewed them on the front and back like so. Make sure you are sewing the right pieces and right parts together.

IMG_4142 IMG_4143

They looked a little dull being all dingy white :) so I added cute little Grosgrain ribbon bows on with some    E-6000 glue (my savior in all crafts!)

 IMG_4150

And you are done! Perfect way to use those tanks and to keep A happy for over an hour. Success!

  IMG_4151